概述
前面的文章中虫虫给大家介绍Wordpress全站容器化的全过程,从VPS初始化,安全加固,资料盘挂载,docker环境准备,应用容器配置和启动,基于容器构建了Wordpress全站,并迁移汇入了历史资料。作为系列的第二篇文章,本文书接第一篇继续介绍对站点全站HTTPS化的过程,站点将使用基于最新的TLS 1.3协议构建,以最大程度提高效能。站点总体架构如下:
宿主机上部署nginx对外提供提供HTTPS服务,并通过返乡代理连线到对映到本机的两个容器作为后端服务器和数据库。HTTPS支援最新的TLS 1.3协议,证书是从Let's Encrypt申请免费SSL,可以一键申请证书并且免费3个月更新。
安装Nginx反向代理服务器
安装包准备
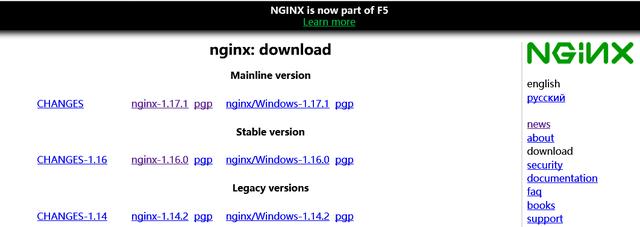
为了支援最新的TLS 1.3协议,我们需要从各自官方下载最新的nginx源代码和OpenSSL源代码。nginx下载页面:
OpenSSL下载页

用到的版本为nginx-1.17.0.tar.gz和openssl-1.1.1.tar.gz
编译安装
新建安装nginx 执行使用者www:useradd www
将两个包都解压到/data/nginx(按需)目录,编译nginx编译时候通过"--with-openssl=/data/nginx /openssl-1.1.1"指定openssl源代码目录,通过"--prefix=/usr/local/nginx"安装目录。
./configure --user=www --group=www --prefix=/usr/local/nginx --with-http_stub_status_module --with-threads --with-file-aio --with-pcre-jit --with-http_ssl_module --with-http_v2_module --with-http_gzip_static_module --with-http_sub_module --with-http_flv_module --with-http_mp4_module --with-http_gunzip_module --with-http_realip_module --with-http_addition_module --with-stream --with-stream_ssl_module --with-stream_ssl_preread_module --with-stream_realip_module --with-http_slice_module --with-openssl=../openssl-1.1.1
make
make install
安装后检视Nginx版本
/usr/local/nginx/sbin/nginx –V

现在可以通过/usr/local/nginx/sbin/nginx启动Nginx。
systemd管理Nginx
为了方便管理以及实现Nginx自启动,我们需要将Nginx服务加入systemctl管理,实现也非常简单。我们新建新建一个systemd服务专案"nginx.service "vim /usr/lib/systemd/system/nginx.service 内容如下:
[Unit]
Description=Nginx - Chongchong's Using it as a Web Proxy!!
Documentation=http://nginx.org/en/docs/
After=network.target remote-fs.target nss-lookup.target
[Service]
Type=forking
PIDFile=/usr/local/nginx/logs/nginx.pid
ExecStartPre=/usr/local/nginx/sbin/nginx -t -c /usr/local/nginx/conf/nginx.conf
ExecStart=/usr/local/nginx/sbin/nginx -c /usr/local/nginx/conf/nginx.conf
ExecReload=/bin/kill -s HUP $MAINPID
ExecStop=/bin/kill -s QUIT $MAINPID
PrivateTmp=true
[Install]
WantedBy=multi-user.target

加入开机启动
systemctl enable nginx.service
启动Nginx
systemctl start nginx.service
还支援 stop、restart和reload操作
systemctl start nginx.service
Let's Encrypt 证书申请
Let's Encrypt证书申请过程也简单,官方提供了对使用者友好的命令列工具certbot-auto,首先下载这个工具并赋予执行许可权:chmod u+x certbot-auto
使用格式
./certbot-auto [certonly|nginx] --email '邮箱' -d '域名'
我们直接使用:

成功生成后会有提示资讯:

记住证书档案的路径,后续Nginx HTTPS配置中会用的到。
Nginx HTTPS配置
编辑Nginx配置档案/usr/local/nginx/conf,配置如下代理快取引数
在http例项部分配置代理相关证书和代理快取资讯如下:
HTTPS和安全配置:
在Server{..} 配置https相关配置server {
listen 443 ssl;
server_name XXX;#域名
access_log /data/web/logs/access.log main;#日志配置
# 证书位置
ssl_certificate /etc/letsencrypt/live/ijz.me/fullchain.pem;
ssl_certificate_key /etc/letsencrypt/live/ijz.me/privkey.pem;
ssl_session_timeout 1d;
ssl_protocols TLSv1.3 TLSv1.2; # 协议仅仅支援tls 1.2, tls 1.3
ssl_prefer_server_ciphers on;
# 限制算法为比较安全的算法
ssl_ciphers "EECDH+AESGCM:EDH+AESGCM:AES256+EECDH:AES256+EDH";
ssl_ecdh_curve secp384r1;
ssl_session_cache shared:SSL:10m;
ssl_session_tickets off;
add_header Strict-Transport-Security "max-age=63072000; includeSubDomains; preload";

代理配置:
通过反向代理代理到127.0.0.1:18080,此即为我们的wordpress容器location / {
proxy_pass http://127.0.0.1:18080;
proxy_set_header Host $host;
proxy_redirect off;
proxy_set_header X-Real-IP $remote_addr;
proxy_set_header X-Forwarded-For $proxy_add_x_forwarded_for;
proxy_connect_timeout 60;
proxy_read_timeout 600;
proxy_send_timeout 600;
}
快取配置:
对图片、html、CSS,js等静态档案进行快取,以提高访问速度:location ~ .*.(gif|jpg|png|htm|html|css|js|flv|ico|swf|eot) {
proxy_pass http://127.0.0.1:18080;
proxy_set_header Host $host;
proxy_redirect off;
proxy_cache webcache;
proxy_cache_valid 200 302 1h;
proxy_cache_valid 301 1d;
proxy_cache_valid any 1m;
proxy_set_header X-Real-IP $remote_addr;
proxy_set_header X-Forwarded-For $proxy_add_x_forwarded_for;
add_header Nginx-Cache "$upstream_cache_status";
expires 30d;
}
储存配置,通过/usr/local/nginx/sbin/nginx -t 测试配置,如果有问题按照提示修改。如果无误通过nginx -s reload载入配置让配置生效。
Wordpress 应用HTTP化适配
通过以上步奏配置无误后,站点https化配置就完成。但是这时候访问站点前台样式都载入不了,都乱了,通过浏览器开发者工具检视源代码发现样式档案连结都还为http连结。登陆后台会发现也进不去,跳转到http地址也访问不了。通过资料设定wp_options表中siteurl和home连个字段为https站点域名发现也步行。后来想到该例项中HTTPS中设定是在反向代理服务器中设定的,而容器总应用还是HTTP,所以直接设定将这两个引数设定为HTTPS地址会有问题。
siteurl和home使用相对路径
突然想到一个解决此类配置问题的灵丹妙药,那就是设定为站点相对路径"/",协议部分和域名根据请求去自动适配,设定资料中siteurl和home引数为/
设定后Ok了,前端显示完全正常。

而且点选绿色小锁验证HTTPS 显示通讯确实用到TLS 1.3。
后台管理HTTPS适配
前台完全Ok了,但是后台样式通过上面的方法没有起到作用没生效,显示乱套了
后来使用配置function函式和config配置$_SERVER['HTTPS'] = 'on';的最终解决方式解决,具体方法如下:
修改wp-includes/functions.php档案,在开始的
require( ABSPATH . WPINC . '/option.php' );行后增加几个个过滤函式替换http为https:
add_filter('script_loader_src', 'agnostic_script_loader_src', 20,2);
function agnostic_script_loader_src($src, $handle) { return preg_replace('/^(http|https):/', '', $src); }
add_filter('style_loader_src', 'agnostic_style_loader_src', 20,2);
function agnostic_style_loader_src($src, $handle) { return
preg_replace('/^(http|https):/', '', $src); }

在wp-config.php增加配置:

然后所有问题都解决,后台也完全访问正常。